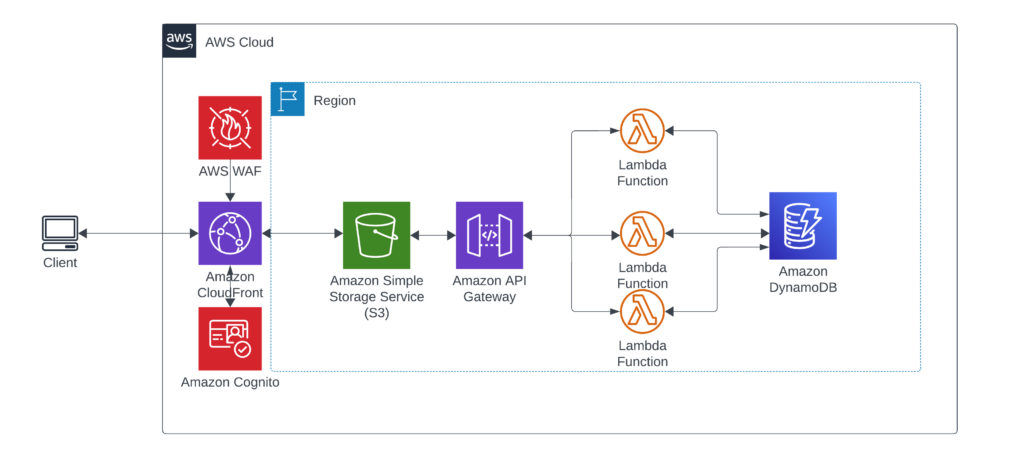
In this blog we’ll be adding AWS Cognito in to add authentication to the serverless website we built here -> Building a Serverless App with AWS Lambda, S3, DynamoDB, and Python
Table of Contents
Setting up AWS Cognito.
navigate your way to AWS Cognito dashboard, on the left select User Pools and then click Create User Pool.


In the Configure sign-in experience select User name under Cognito user pool sign in option and leave everything else default.


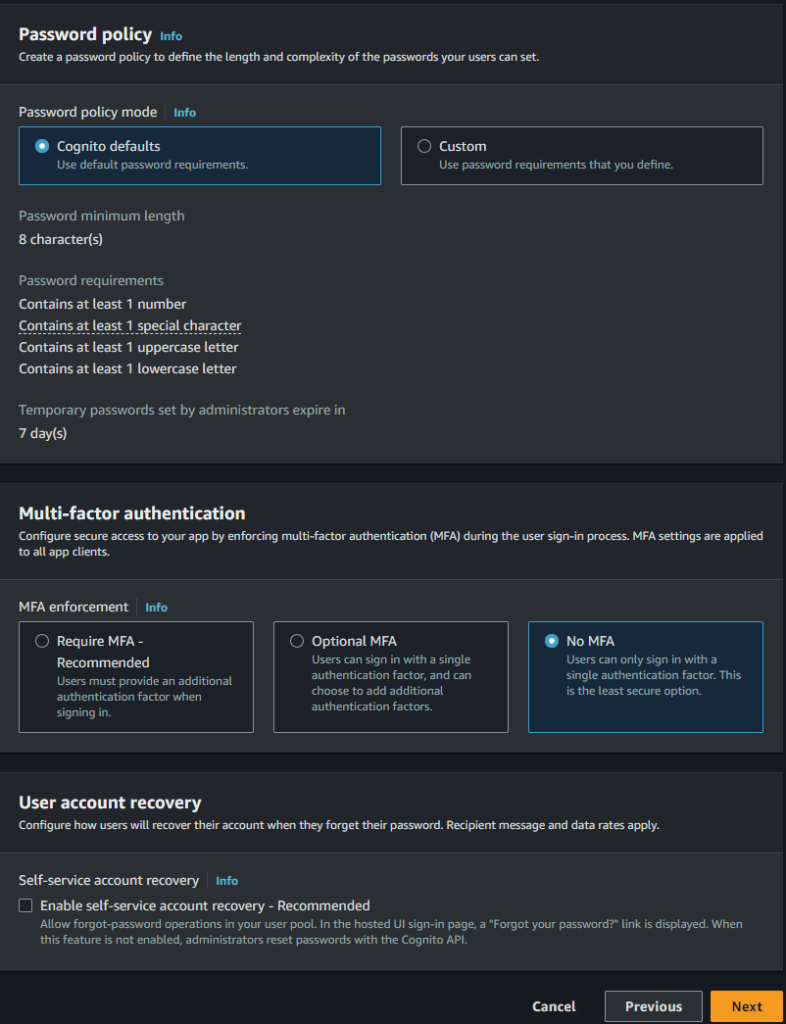
in Configure security requirements section change the following.
- Password Policy Mode – Leave default.
- Multi-factor authentication – No MFA
- In a production environment, you’d leave MFA enabled as it’s a critical part of securing any web-facing application.
- User Account Recovery – Untick.

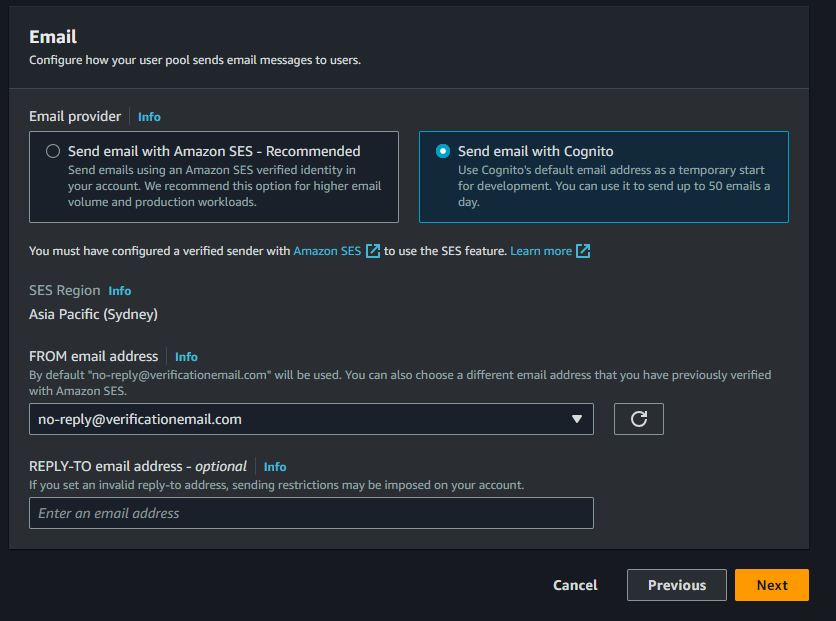
- Enable Self-Registration
- Allow Cognito to automatically send messages to verify and confirm
- Select Send Email with Cognito.

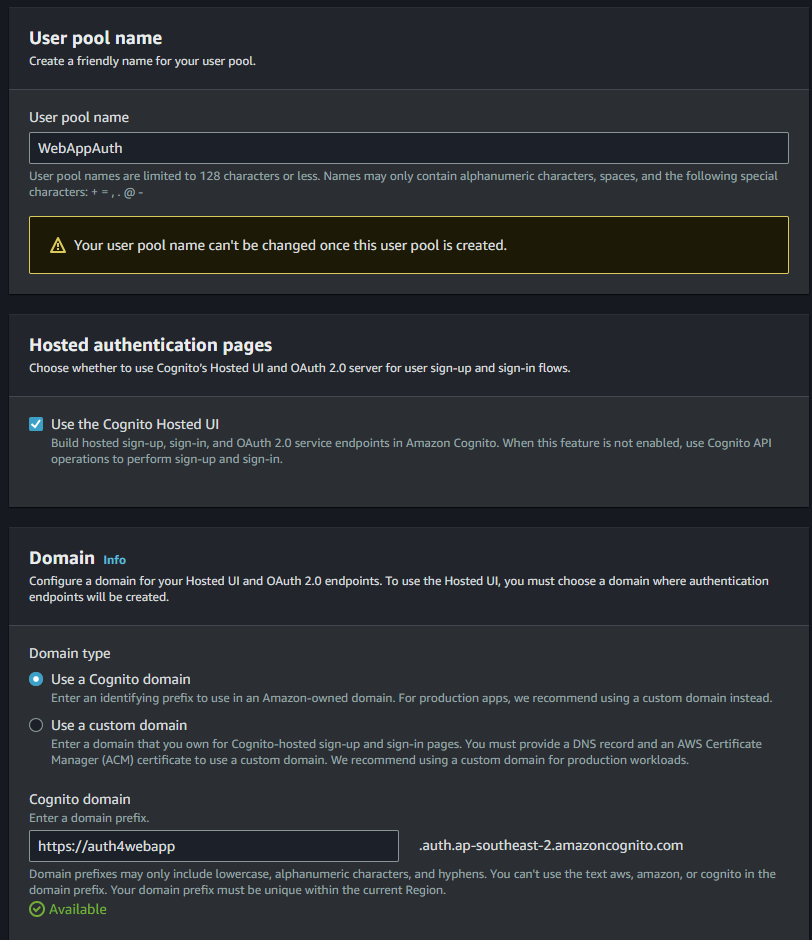
onto the next section, Configure the following sections.
- Give your User pool a name
- Hosted authentication page – tick – Use the Cognito Hosted UI
- Domain Type – Use Cognito domain
- Cognito Domain – give your domain a name.

- App Type – set to Public Client
- App Client Name – enter a name.
- Allowed Callback URLs – here is where we enter the URL that CloudFront is serving up.
- you can find this by going to the CloudFront Dashboard -> Distributions, Clicking the distribution you want to put behind Cognito, and copying the Distribution domain name and appending the HTML page you want to redirect to after logging in.
- in our case you’ll want the CloudFront domain/index.html
- Click Next
- Scroll to the bottom of the Review page and click create user pool.
Creating a User.
Click into your newly created User Pool and under the users tab click create user.
Set yourself up a new user.


Configuring the login page.
staying within the user pool head to App Integration tab and scroll to the bottom to App Client List.


Click into the App Client about halfway down the page you should see View Hosted UI


Click the View Hosted UI, it should load up the below screenshot.


Copy the URL and head over to the log_in.html located here -> xnomle/ServerlessWebApp: Code for my AWS Serverless Web App (github.com)
On line 41 copy the URL just after the href=
Don’t forget to save the html page.


Updating Cloud Front and S3
load up the S3 dashboard and select the S3 that contains the static website that Cloud front is publishing.
Upload the Log_in.html file, your S3 bucket should contain the following files.
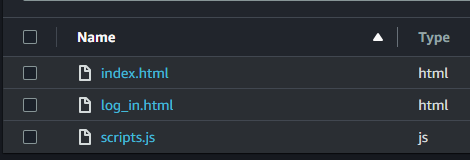

Now head back to your cloud front distributions and select edit on the settings page.
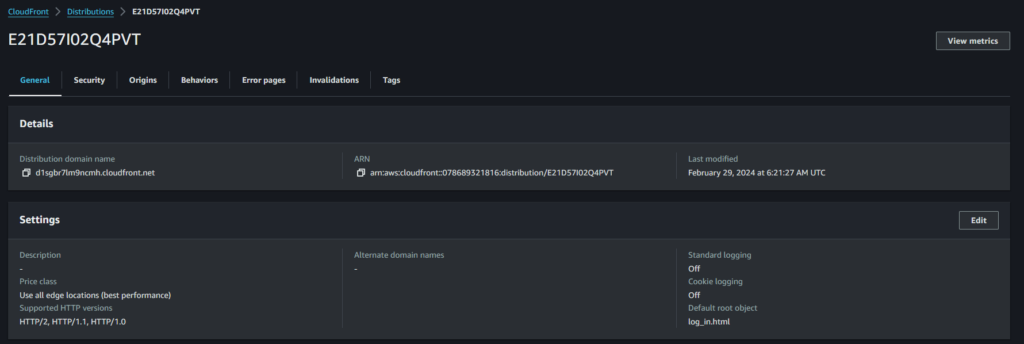

Leave all the settings as they are bar Default Root Object, which needs changing to log_in.html.
Save changes.


Still within your CloudFront distribution go to the general tab and copy the domain name into your web browser.


if everythings been configured correctly you should see a login page, click the log in button and the browser should load into the Cognito Hosted UI we saw earlier!
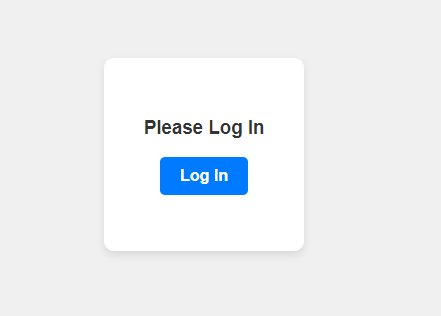

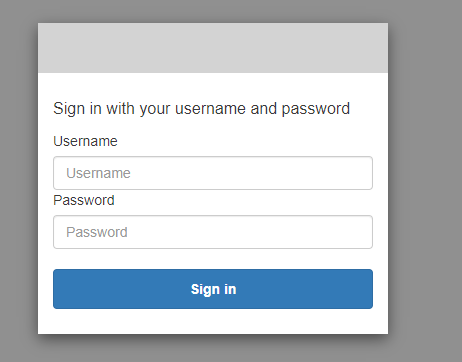

Enter the username and password we configured earlier and you should get prompted to change the password.
If everything’s setup correctly it should now redirect you to the Manage Employee Screen!


